- Download SteamCMD and extract it to its own folder (e.g. a new folder on the desktop).
- Open the SteamCMD folder and ensure that "File name extensions" is enabled under the "view" tab in Explorer.
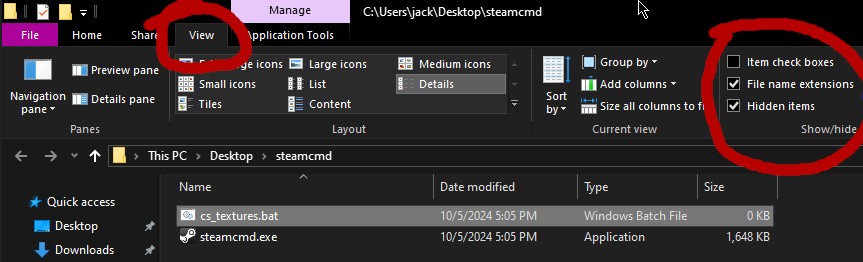
- Create a new text file by right-clicking inside the folder, and rename it to
cs_textures.bat (make sure to remove the .txt at the end).
- Right-click on cs_textures.bat and click Edit. A notepad window should open.
- Paste the following into notepad, and save it:
.\steamcmd.exe +login anonymous +force_install_dir ./css_ds +app_update 232330 +quit
- Close notepad and double-click on
cs_textures.bat to run it. This step may take awhile. It should produce a folder called css_ds with a folder within called cstrike
- If this folder does not exist after running
cs_textures.bat, run cs_textures.bat again.
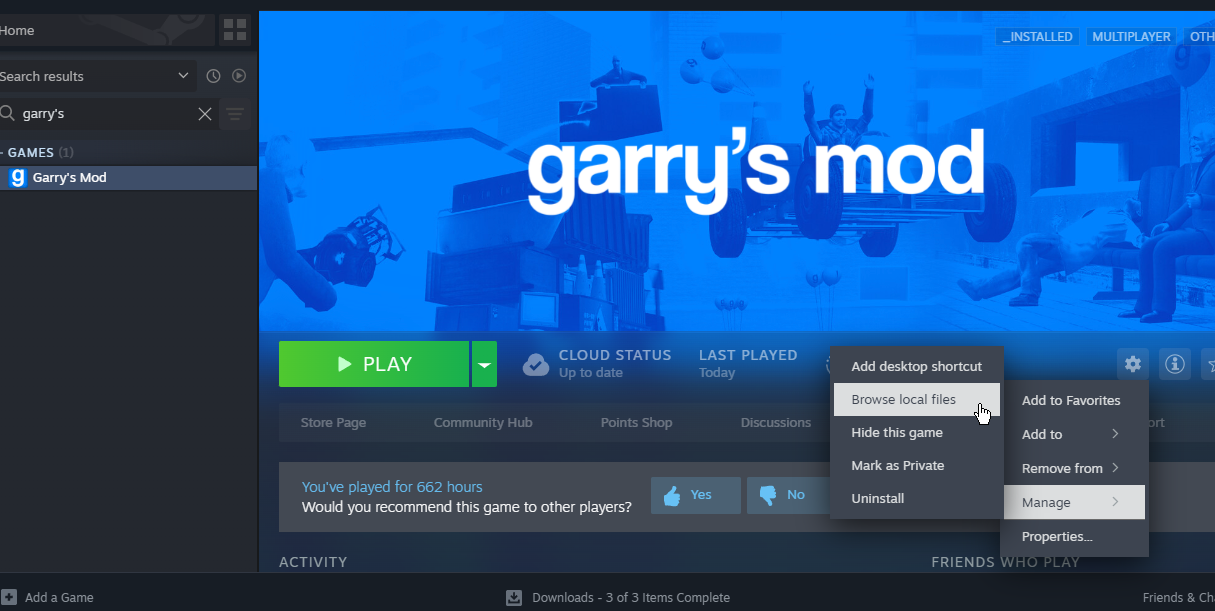
- Open the game folder for Garry's Mod. Easiest way to get there is from Steam:
- Open the
garrysmod folder, then the cfg folder.
- Open the
mount.cfg file in notepad
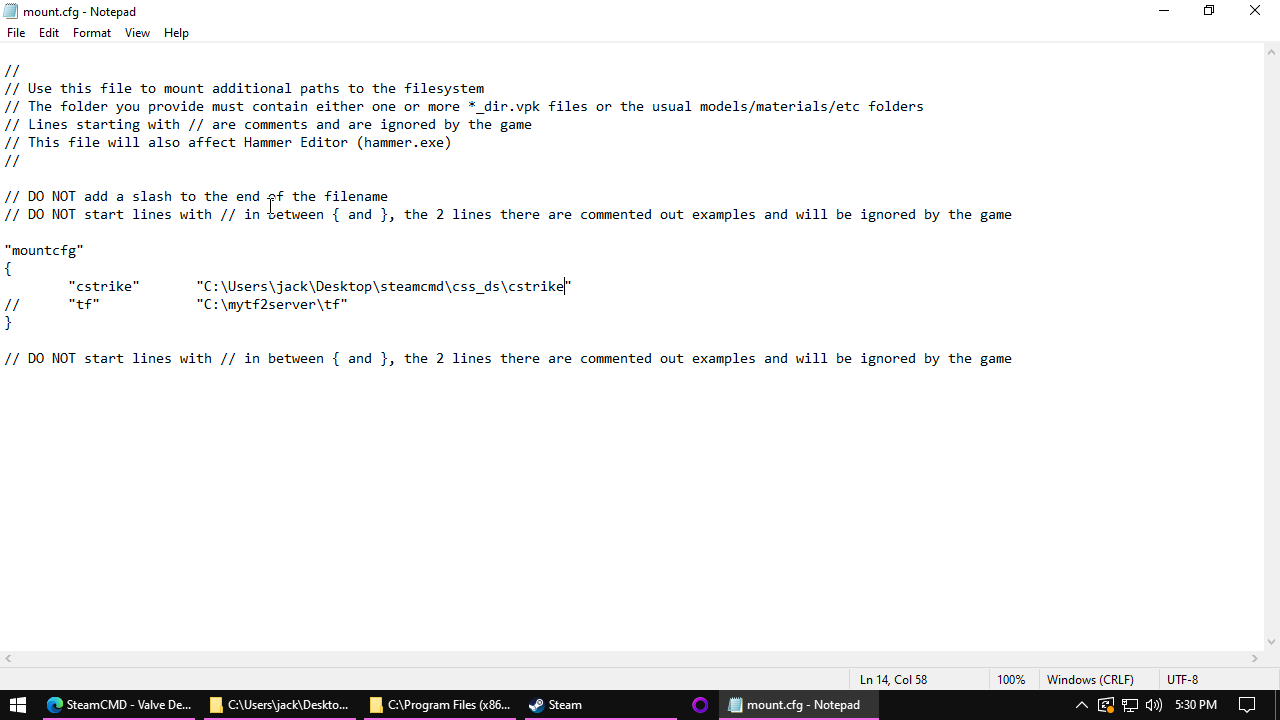
- Find the
"cstrike" line and remove the // at the beginning
- Replace the path in quotes (starting with
C:\) with the path to your cstrike folder from Step 6. You can find the path by opening your cstrike folder from Step 6 and clicking the address bar in Explorer.
Your mount.cfg file should look something like this:
- Save the file and open Garry's Mod.
- Open the "Start New Game" menu and make sure you can see Counter-Strike Source maps listed